If you are an "old gaffer" like me, new technology comes slower and slower each year. I recently uncovered in Google Earth a process by which Civil War maps could be overlain on modern air photos with ease and with some surprising results. I would like to share this method with my fellow metal detecting colleagues
I will walk you through the process using an example from Chattanooga, Tennessee. Let's begin by entering this location into Google Earth. This will provide a base air photo on which to plot various locations.
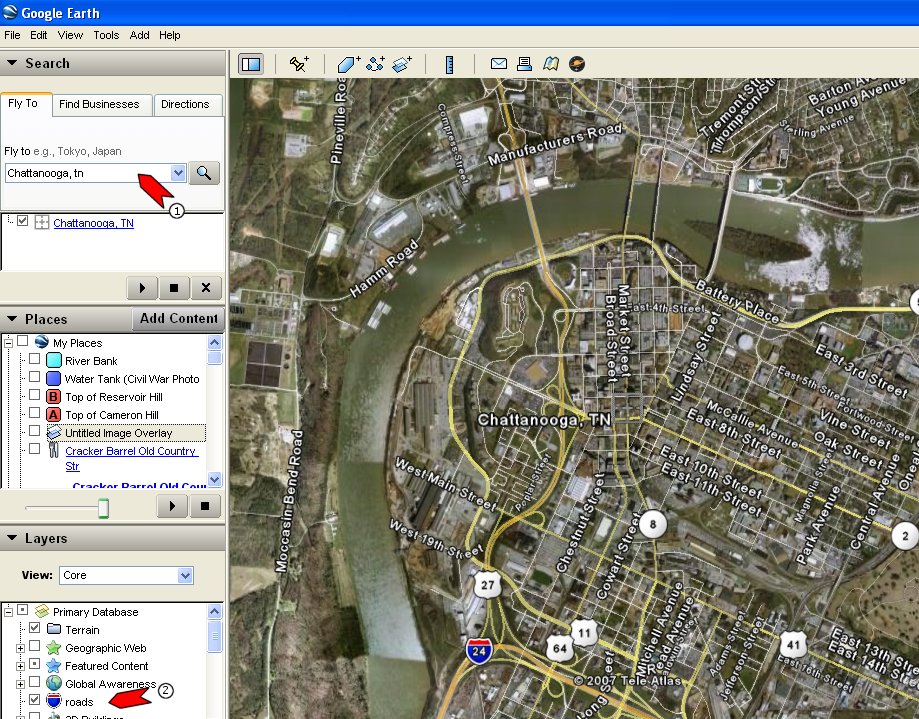
Begin by entering the name of your base location in the "Fly To" area (1) and be sure "roads" laayers is checked (2). Zoom into display until individual road names appear.
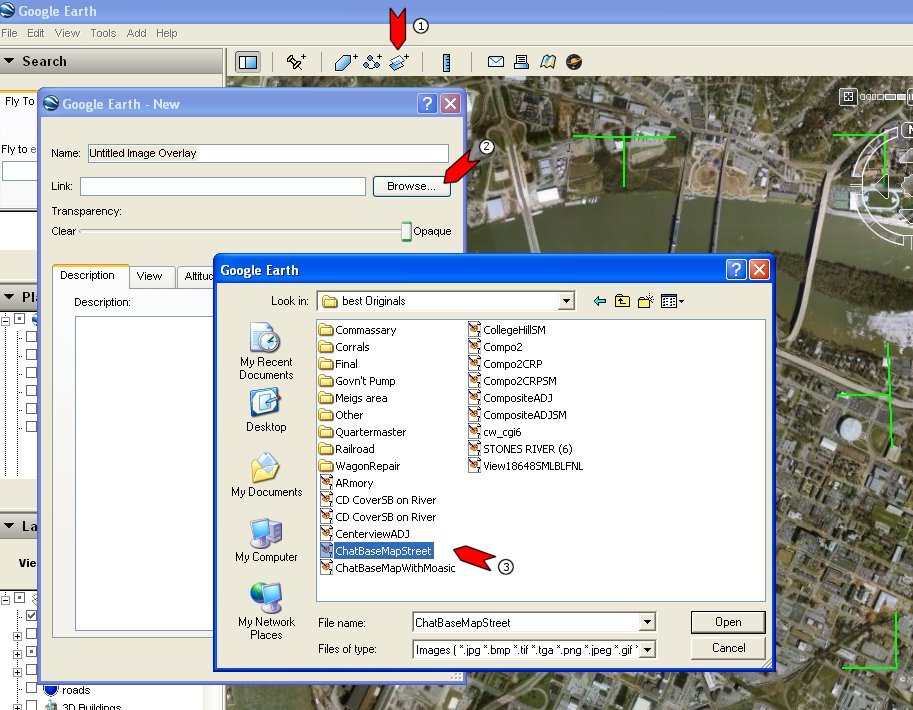
Next, click the "Add Image Overlay" icon (1) at the top of the screen and find find it by browsing (2 and 3) your computer for the image you wish to overlay over the Google Earth display. In my case, it is an 1863 map that Sherman's topographic engineers made of Chattanooga. This map greated aided the construction location of new bulidings, fortifications and campsites which were made in Chattanooga before Sherman made his march to the sea. Notice a set of green lines will appear on your Google Earth display and these will be used to rotate and guide your image till it closely matches the roads and streets of the air photo.
In your case, the overlay could be any scanned map you have access to that has the location of old roads or campsites or fortifications marked on it.
When the map overlay is first displayed, it will be opaque and its transparancy will have to be adjusted.
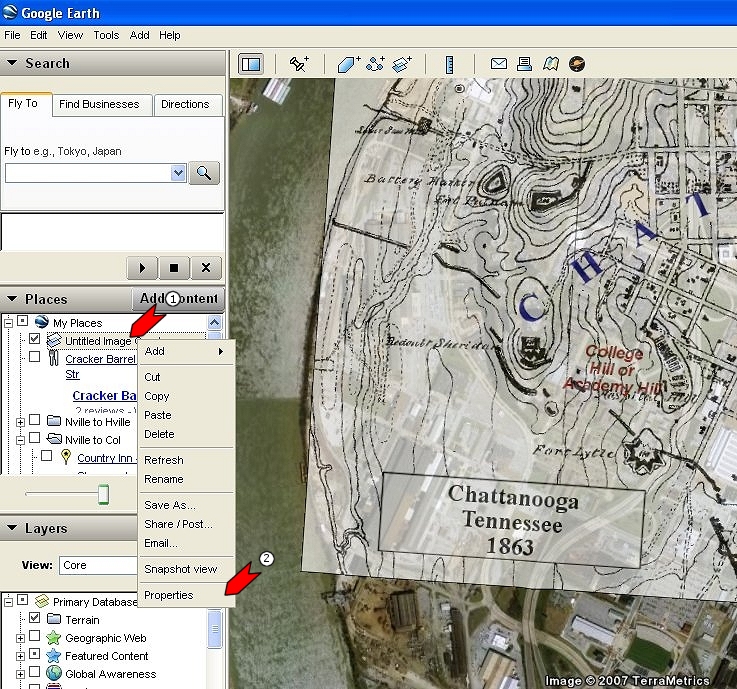
To adjust properties of the overlay, RIGHT CLICK the "untitled Image Overlay" in the Places sidebar (1) and LEFT CLICK its properties (2) this will bring up the properties of the overlay image.
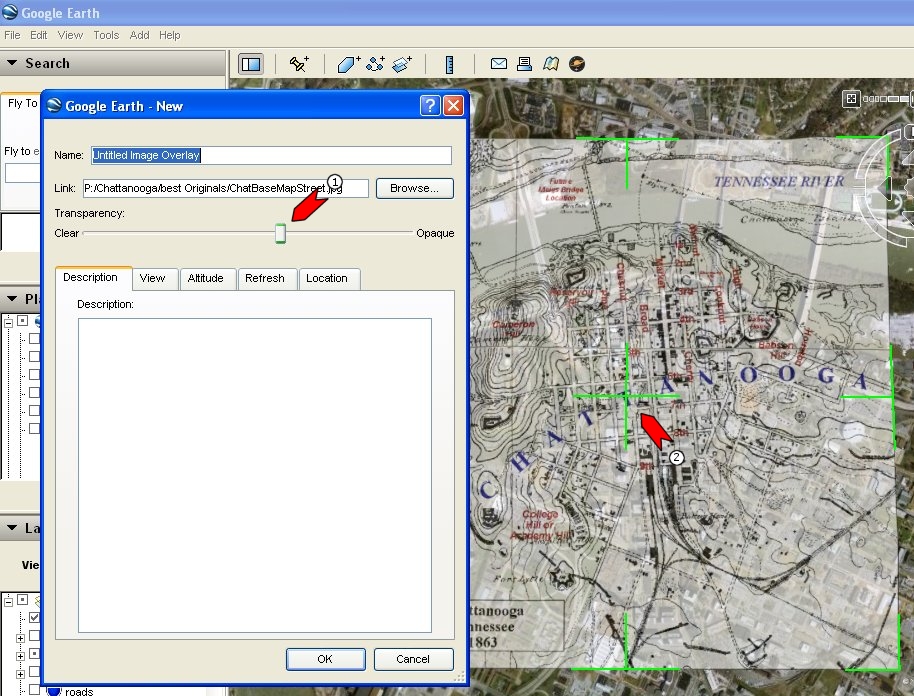
When the Properties box appears, adjust the transparency slider so that the Google Earth roads can be seen through the image (1) Now move and adjust the image using the green lines around the image(2) till a good match is achieved. This may take a little time. When a match is made CLICK OK on the properties box.
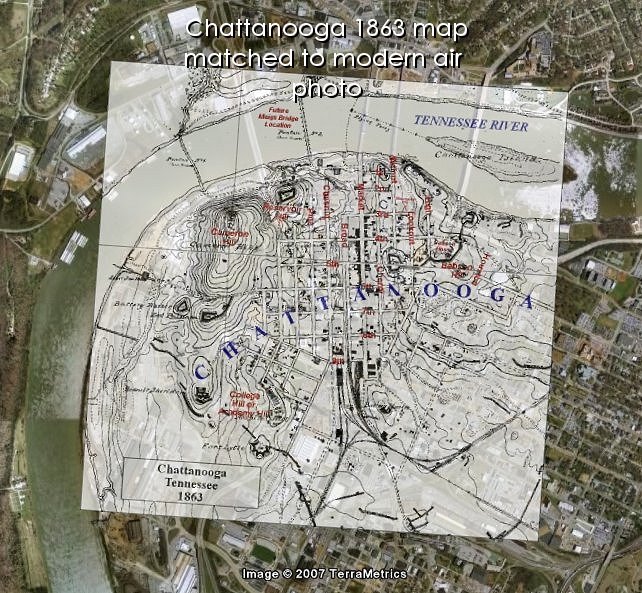
Here is the matched map overlay and base air photo.
NOW THE FUN BEGINS..
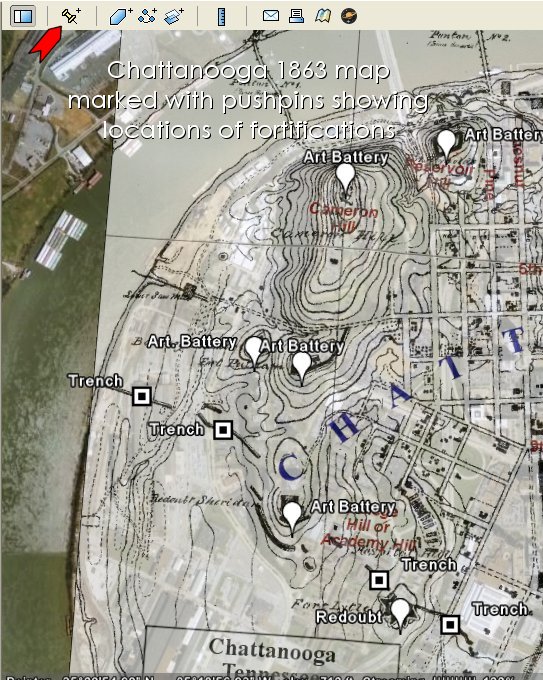
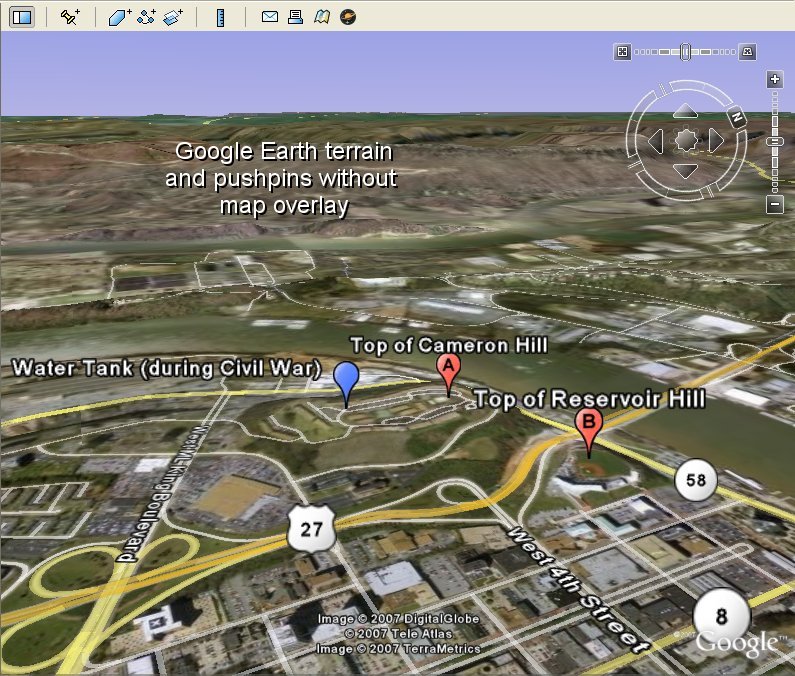
Let's begin by marking and labeling the overlay with Google Earth pushpins (Red Arrow). In my example, I have put pins at artillery battery locations and along various fortifications (trenches, redoubts, etc.)

By unclicking the overlay image checkbox on the sidebar, the locations of the fortifications are transferred to the base air photo and there is something even better!! their exact location is now known.
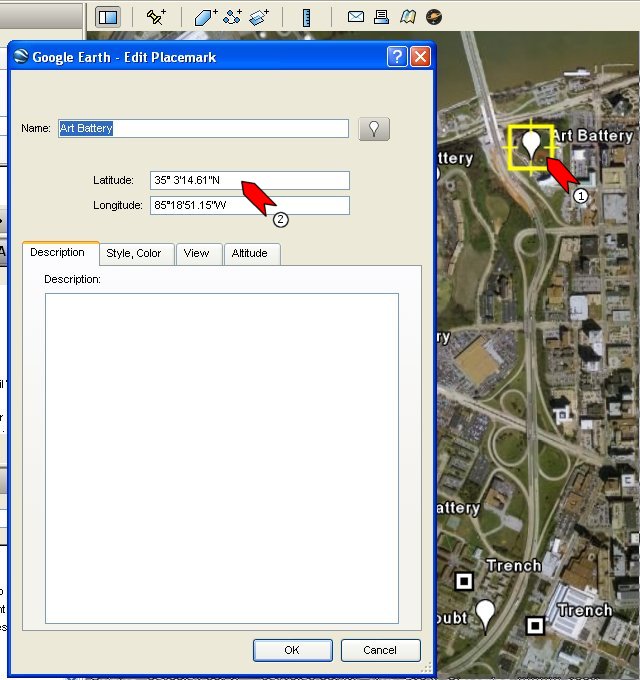
Right clicking any of the pushpins (1) and selecting its properties allows the pushpin them to be repositioned.. Better than that its latitude and longitude are now known. These coordinates can be input into any car or handheld GPS and will allow you to drive or walk to its exact location.
Hopefully you are using a GPS to document and plot your finds. I have used my handheld for about 7 years now and I can recommend their use in all aspects of metal detecting.
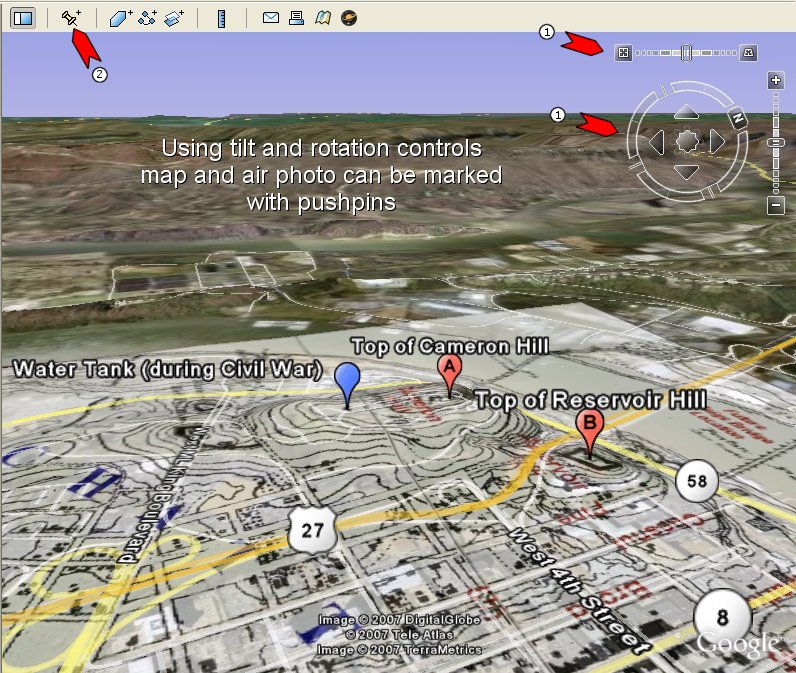
Even better, the display can be tilted and rotated with the tilt and rotate controls (1) and new pushpins can be added to the tilted display(2). Notice that the overlay map drapes across the Google Earth terrain. and the overlay can be removed as shown below.
Taking these same pushpins and rotating the tilted view reveals more of the terrain drape
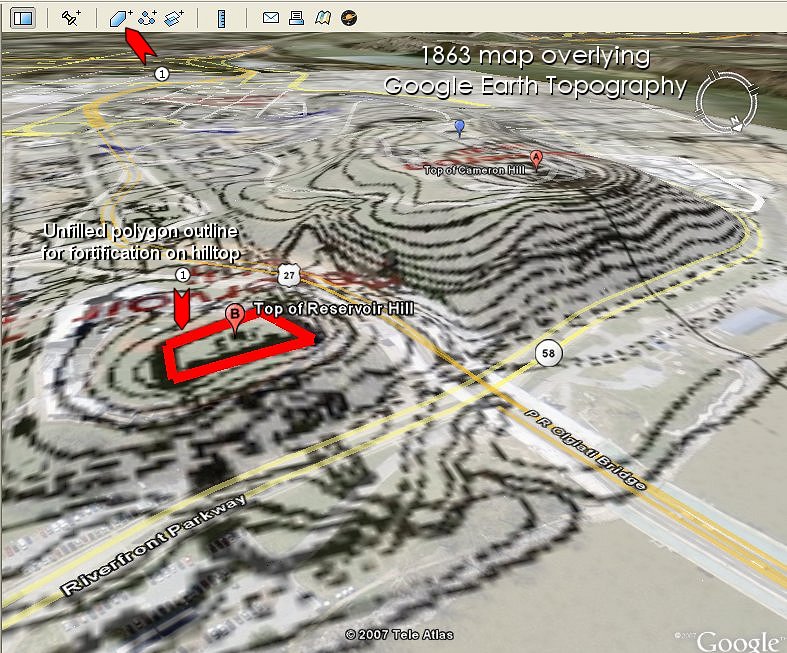
Using the Polygon Tool (1), I have outlined the fortifications on top of Reservoir Hill. Unfortunately removing the overlay reveals that the fortifications now lie in the middle of a baseball field.
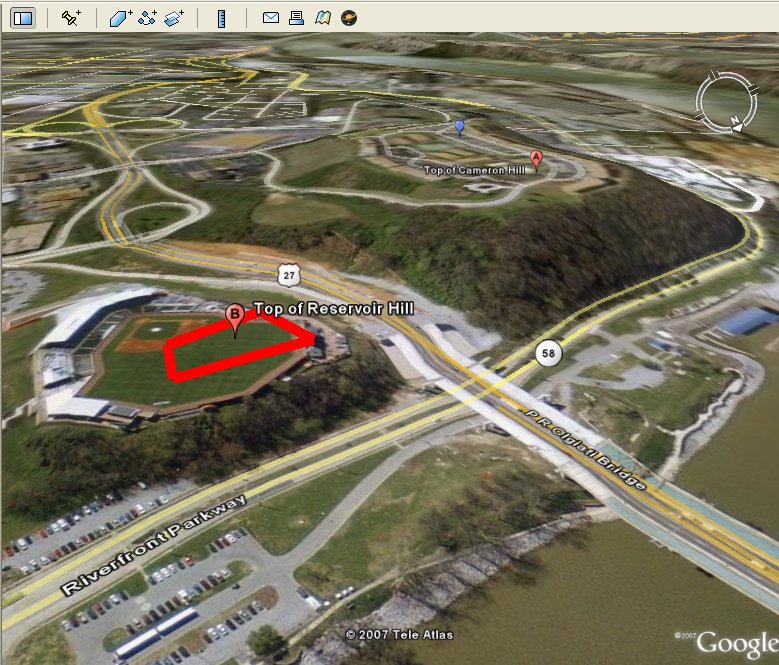
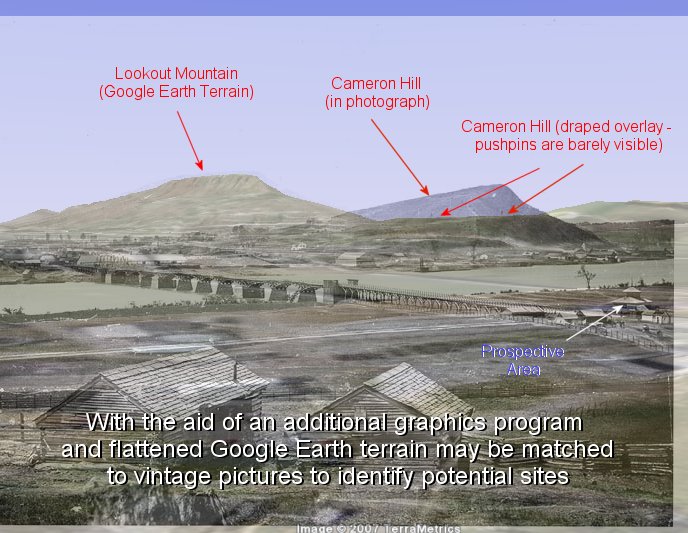
Hopefully someone preserved the relics before the bulldozer. It is also possible to tilt the display so the locations found in ventage pictures can indicate future potential hunting sites. This will require a graphic program to overlay the two images.
I have taken a figure from my CD showing a map I scanned from the ORs of the Gettysburg battlefield. The map shows the position of several CS and US artillery positions onto which I have superimposed the scaled distances for different projectile types to be used by the artillerists by regulation as the enemy advances upon their position. If hunting were allowed then the blue area is where solid shot and shell would be expected and the red areas would be canister distances.
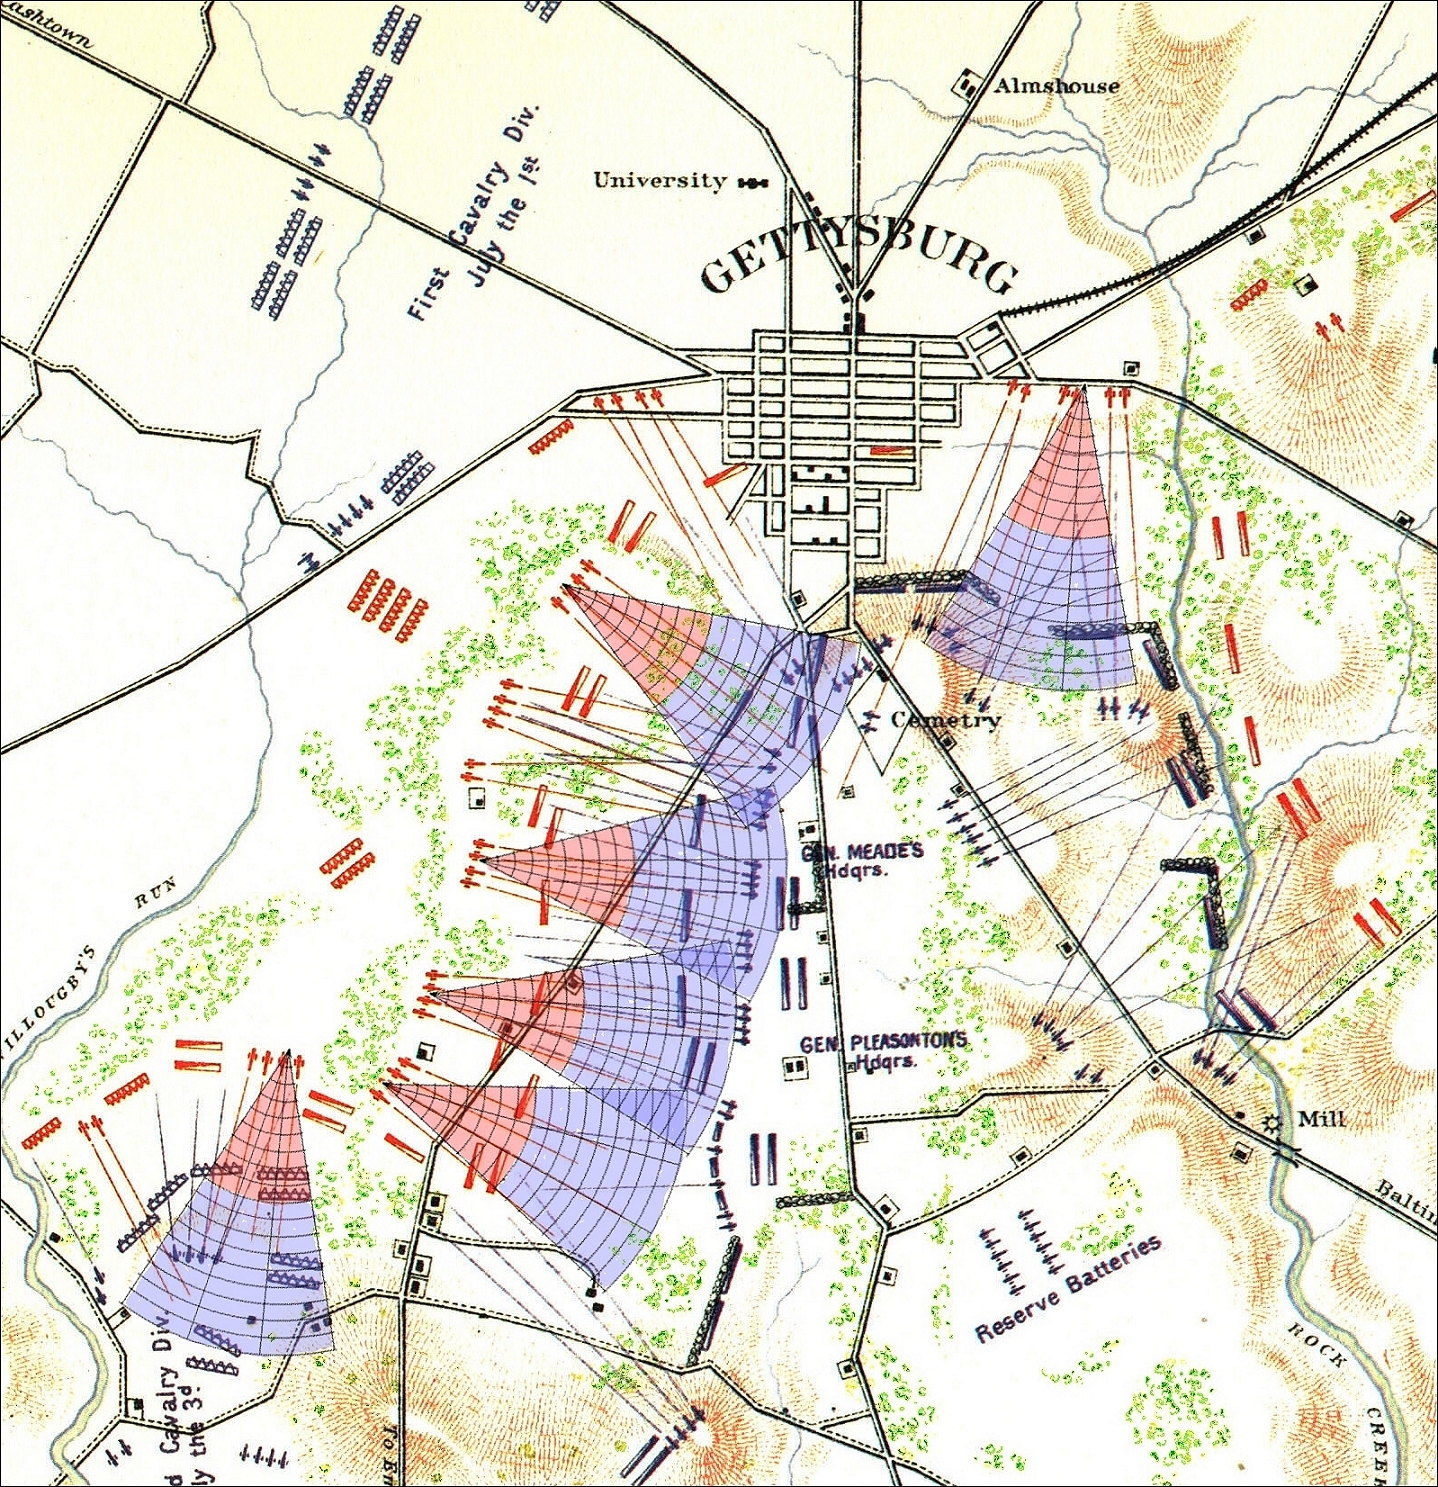
Although there was a pretty good match to the roads, the position of Fairfield Road appeared to be a non match and was out significantly. This could be an error on the map.
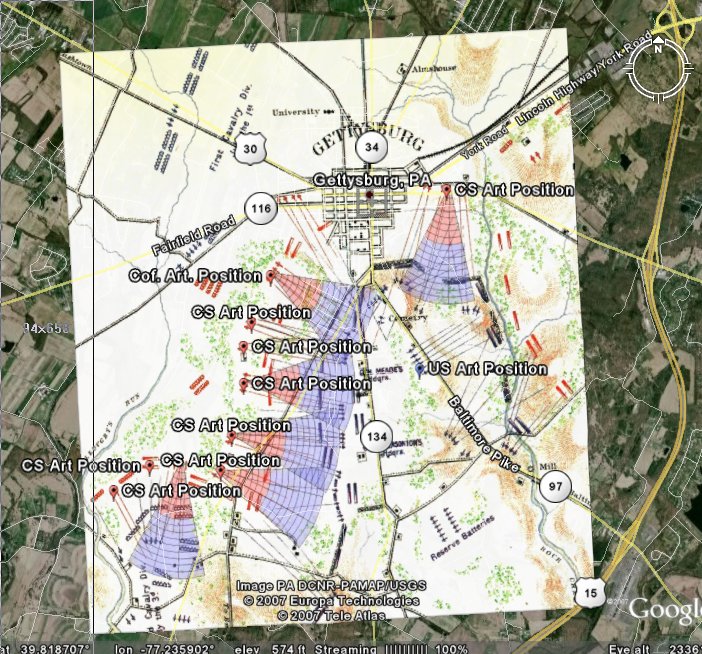
Next I removed the map overlay to see the positions on the Google Earth display as shown below
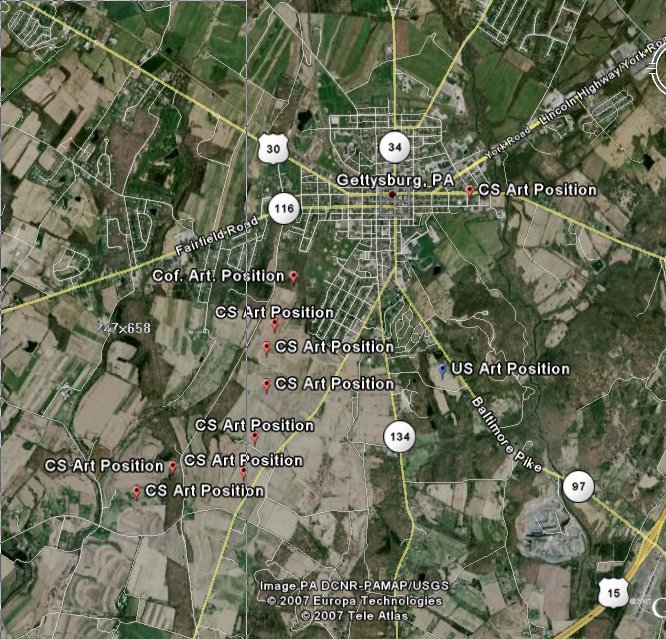
Here you can see the pushpin locations for the artillery positions superimposed over the Google Earth view.
Finally I added the OR map overlay back into the display and tilted and rotated the view. This is shown below.
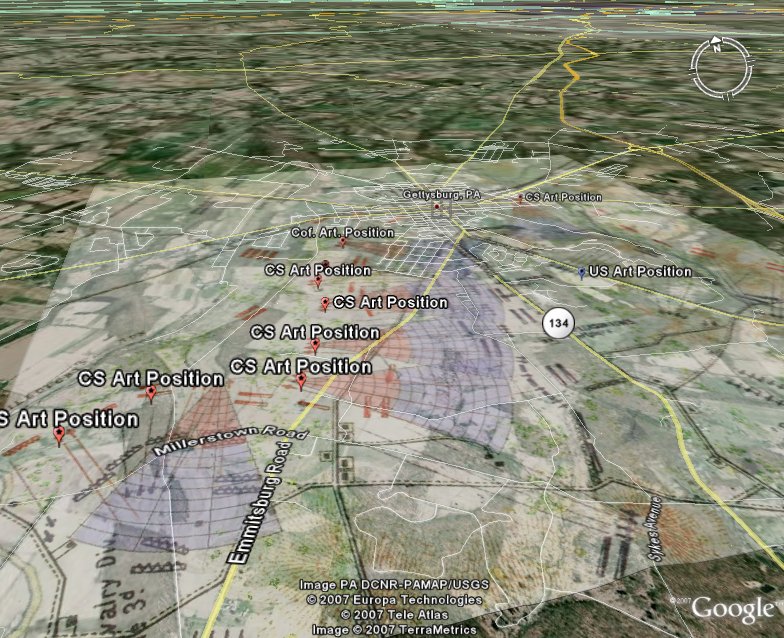
Here you can see that the Confederate artillery was positioned behind the Emmitsburg Road (an old ridge runner road) just behind the ridge crest and were shooting into the lowland valley between State 134 and the Emmitsburg road. This certainly gives some additional insight.
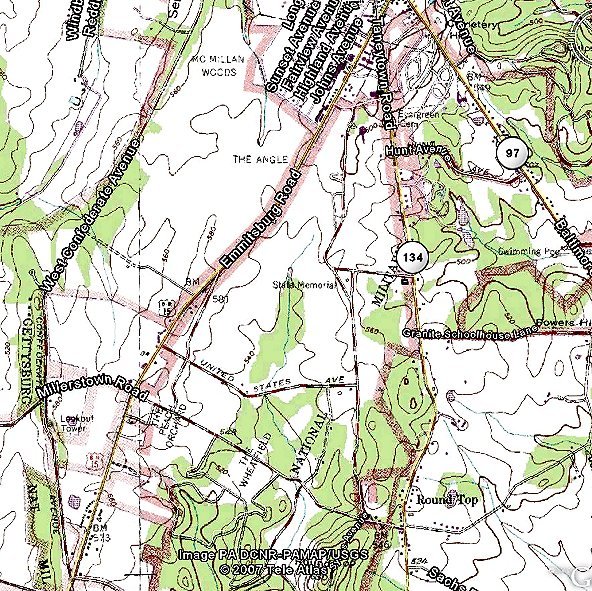
To confirm this apparent terrain, here is a topographic map overlain over the same area in Google Earth showing a stream drainage between the two roads. The Confederate artillery were situated in the large flat area to the west of the Emmittsburg Road. This allowed for easy escape should their position be overrun yet gave them a commanding firing position.
Ideally, the best firing position should be on a relatively flat at the the same level to 45 to 50 feet above the intended terrain that the enemy would move over. Artillery instructors suggested that the maximum difference in elevation should be no more than 300 feet. It appears that the Confederate artillery was ideally positioned.
Note the ridge runner nature of the Emmitsburg Road. Notice that the Military Park outline incorporates the area we are illustrating.
Like what you read? You can find more techniques like this in my books and CDs. DP
metal detecting research
GPS waypoints of Civil War relics
Google Earth
Gettysburg
artillery