Many of my CD readers know I like to use a handheld GPS when I metal detect. My recommended computer program for plotting my GPS relic locations on air photos or topographic maps is OziExplorer. In OziExplorer, each different type of relic (bullet, button, buckle) that I dig is assigned a plot symbol so that on a typical plot all the .58 caliber Minies have the same symbol
Someimes patterns in the plotted relic field show up after several visits to a site. For example, an area within a campsite where lots of melted lead fragments are found along with carved bullets could be the place which I call the "whittle and spit" place where men gathered at night around a fire, maybe to keep warm, to talk about the day's happenings. Sometimes bullets shavings were cast into the fire or sometimes carved bullets were cast into the fire just before turning in. If you knew this, wouldn't you look for charcoal fragments next time you got a signal in this area to prove your theory?
Here is a process to transfer these special areas of a campsite to Google Earth so that its tilt and rotation capabilities might aid the research process.
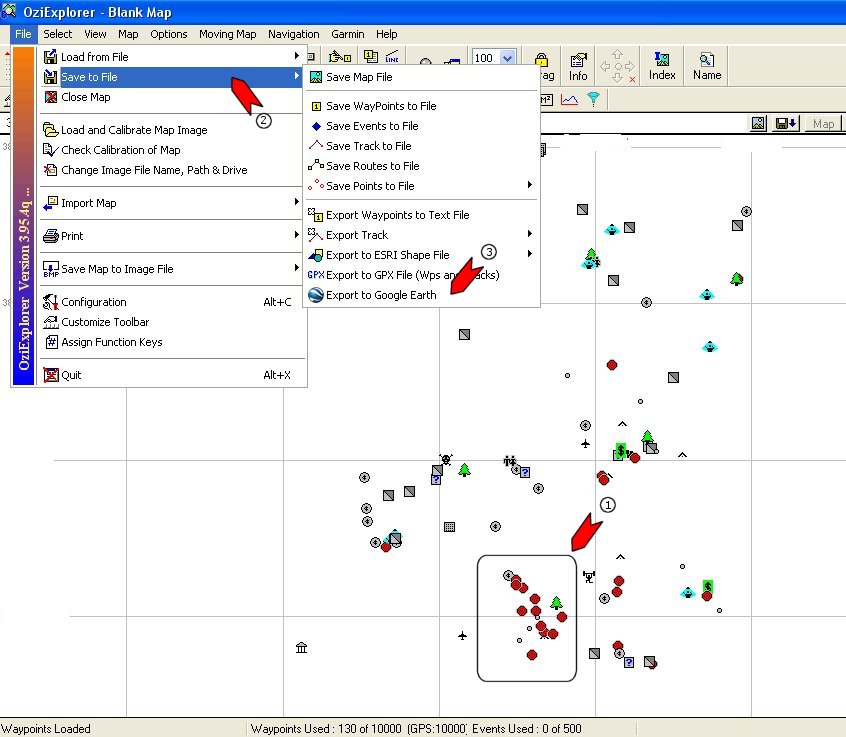
I will walk you through the process using an example from one of my early relic fields. For obvious reasons, I have tried to delate any latitude or longitude references to this location. Let's begin by plotting the relic field of this location in OziExplorer as shown below.
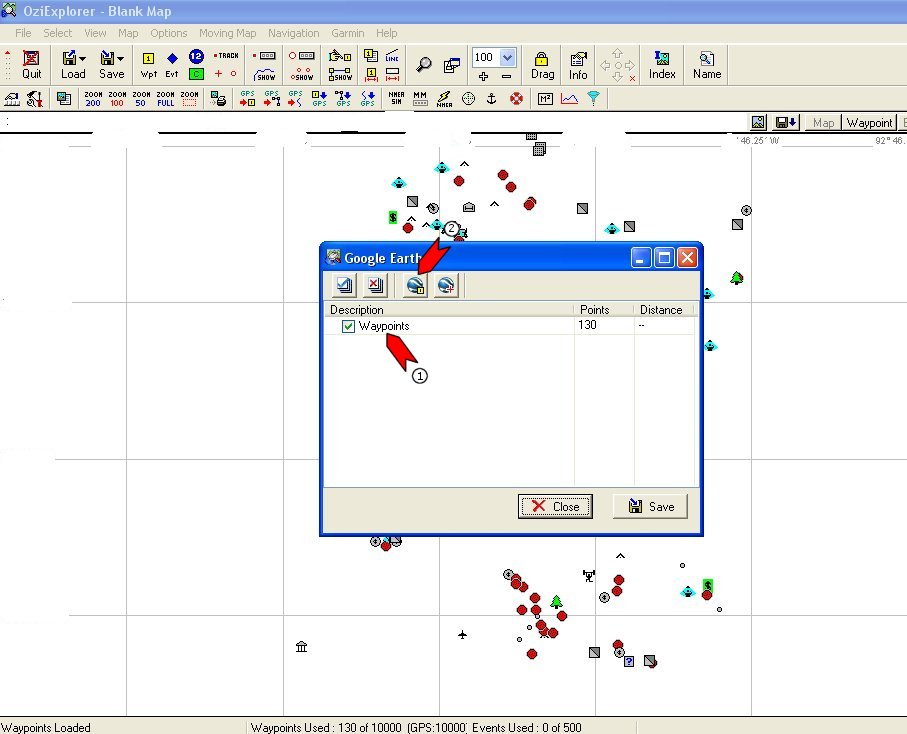
The next screen that comes up is the Google Earth Transfer Screen:
All the data of the relic field (130 relic locations) are about to be transferred.(1) along with any other OziExplorer fields (tracks, routes and special symbols or comments) will also be transferred if left checked. Left CLICK the Google Earth icon (2) to start Google Earth and plot the relic field.
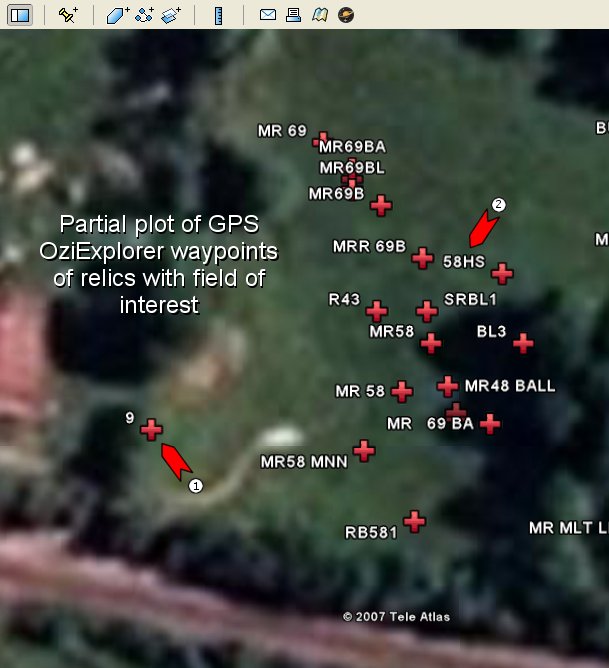
Here is the area of the relic field that we are interested in plotted in Google Earth. Unfortunately, Google Earth does not plot the Garmin symbols as its waypoint icon, instead a red cross (1) is plotted for all waypoints. Next to most of the red crosses are some letters and numbers (2) which are the relic codes placed on both the relic bags and GPS waypoint id codes at retrieval. I can see that the codes are not consistant and it probably means that my partners and I were just starting out with coding and waypointing relics,
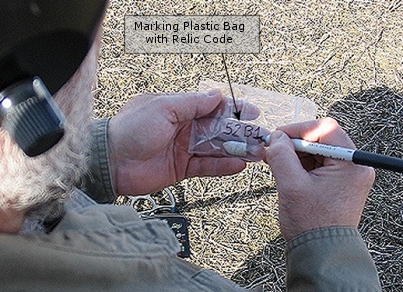
The full GPS field procedure has now been set out in my latest CD. The picture above shows co-author Wayne Rex placing a relic code on a plastic relic bag in the field. The code reads "52B1" meaning the first .52 caliber bullet find of the day. There is more of this procedure in the CD if you are interested.

In order to change the icons of the relics in this area. RIGHT CLICK any of the red cross icons (1) to bring up the waypoint properties panel (2) by LEFT clicking the "Properties" choice on the drop down menu. And the following will appear.
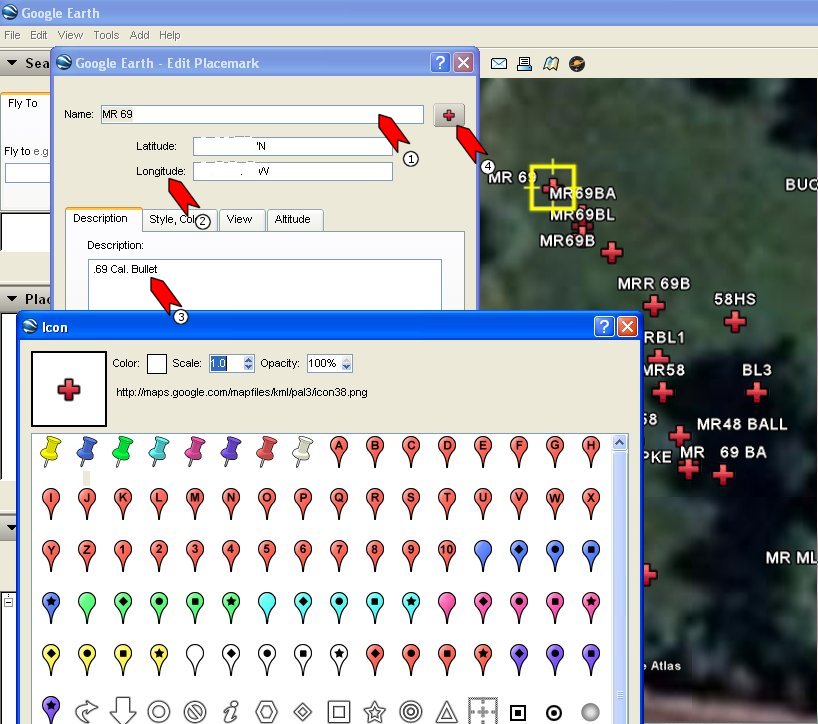
The name field (1) is the original Garmin field code and (2) is where the field latitude and longitude will appear. The original description added to the field data in OziExplorer is shown at (3) and if we click at (4) we will be offered a choice of replacement icons. I chose the large circle to represent .69 caliber projectiles. I then went to each waypoint with a different relic and assigned a new icon to it. In retrospect, It probably would have been faster to build a subset of .69 projectiles waypoints from the original 130 relics in OziExplorer and then transferred it to Google Earth.

We now need to isolate just the .69 bullets and round balls (large circle icons) from the relic field. To do this we save the data by exiting Google Earth and we are asked if it should save the data to the "Places" part of the sidebar. Answer YES. Restart the program and in the Places area a complete listing of all of the waypoints of the relic field can be found..
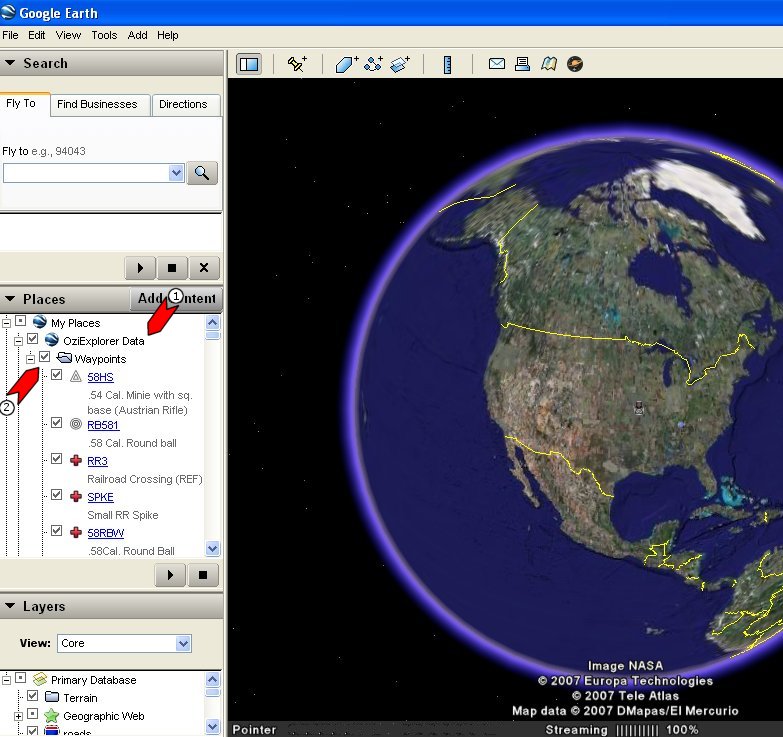
Notice that the OziExplorer data is now saved under My Places (1) with its original OziExplorer descriptions. Each of the waypoints in the interest area has a new icon. To select only the .69 projectiles, UNCHECK the "Waypoints" check box. This will turn off all of the waypoints then CHECK only the .69 waypoints with new icons. This should be only the ones we are interested in. Zooming in and rotating and tilting the display shows the linear pattern of the ,69 projectiles in the area of interest.
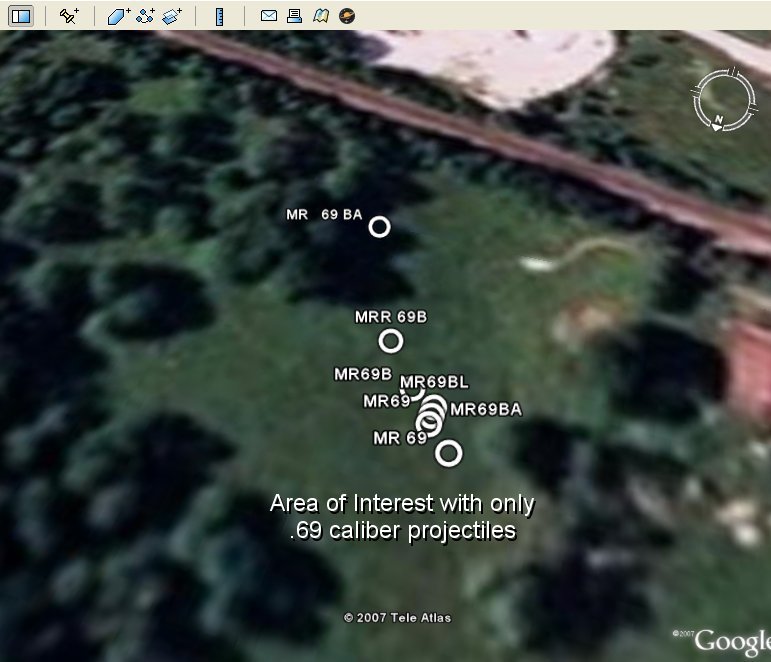
What caused this pattern? If we were in a skirmish or battlefield situation this could have been caused by an accidental drop while running or engaging the enemy. If in a campsite, this might have been the trail to the privey or to the sutler's tent. Or it could have been a bunch of wet cartridges simply dumped on the ground. In any case, this pattern can lead to more relics and a further understanding of either the engagement site or campsite.
In any case, pattern in relics do show up and sometimes can be explained after closer examination with a program like Google Earth.
DP
OziExplorer
Google Earth
Civil War GPS waypoints
Data Transfer