Propeller Maintenance
Johnson H T and J Series
By David Poche
Why Maintain a Propeller: The propeller assembly consists of several components whose purpose is not only to drive the outboard forward in the water but also to protect the engine's drive shaft should the propeller hit a solid object while underway.
Service of the components of the propeller assembly is like the servicing any any outboard component. Proper disassembly, cleaning, lubrication and reassembly with replacement components will aid the next time an overhaul is required and will make the next disassembly faster.
Propeller components are often overlooked under the "if it ain't broke, don't fix it" maintenance philosophy. The result of non-maintenance is that the assembly can degrade over time, oxidize and wear due to sediment influx.
This is a great winter maintenance project.
Components of Propeller Assembly
There are five components in the propeller assembly between the Prop Nut and Cotter Pin and the Shear Pin. The figures below show the components and their arrangement in the assembly.
After the prop nut has been removed from the propeller shaft, the assembly usually comes off as a unit. Often old age, rubber degrade, oxidation and sediment have solidified the parts of the assembly into one unit.
Should the propeller hit a solid object, the hub is allowed to turn around the ribs of the rubber ring (clutch) and/or the propeller is allowed to turn around the rubber ribs of the ring. Both actions prevent the shear pin from breaking and further protect the drive shaft from damage. If the assembly has become stuck together then it will not perform its designed function and the outboard will break shear pins every time the propeller is inhibited.
Each component of the assembly should be separated, cleaned, and lubricated for best performance.
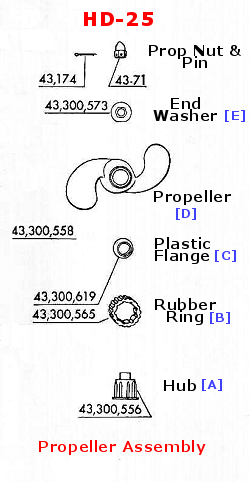
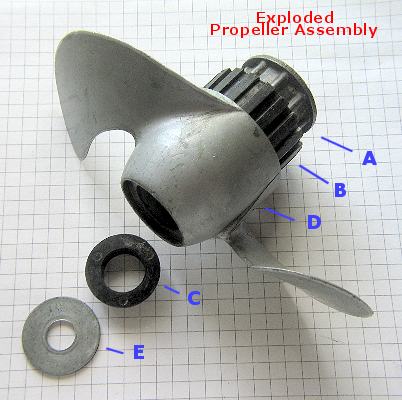
The exploded view of the propeller assembly shows the position of each component along the propeller shaft. The prop nut and cotter pin are not shown. The grand purpose of this assembly is to protect the drive shaft while providing input to the propeller motion. On the left, is a portion of the parts manual for the HD-25. The rubber ring (43,300,565) is probably most subject to degrade over time. The rubber ring part number has recently been changed to 315471.
|
|
|
Disassembly |
|
|
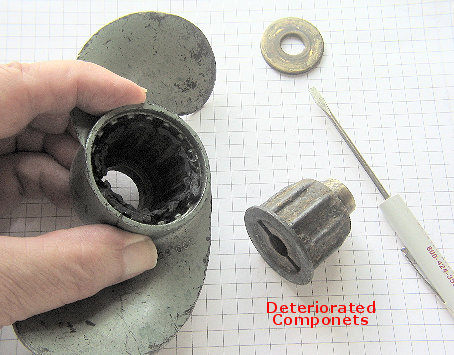
The above view shows deteriorated components of the propeller assembly. The rubber ring [B] is bonded to the inside of the propeller [C] and the hub [A] shows lots of oxidation. Under these conditions, the hub can usually be pushed out of the propeller with the fingers; sometimes a small drift has to be used but be careful not to damage the plastic flange [C, not shown]. The end washer [E] is shown in the upper part of the figure. The shear pin slot is part of the hub and is shown.
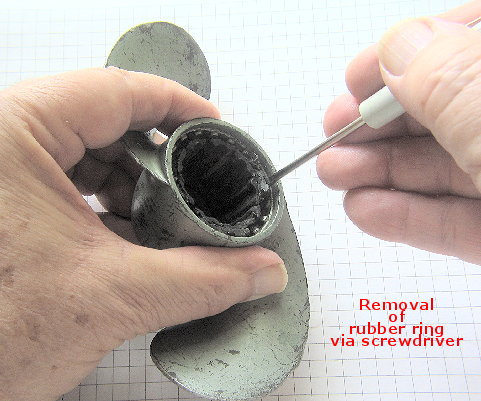
The rubber ring can be removed by using a small screwdriver to pry the rubber from the wall of the propeller. If it remains intact it can be reused after cleaning and lubrication. If it is too deteriorated and falls apart, it has to be replaced.
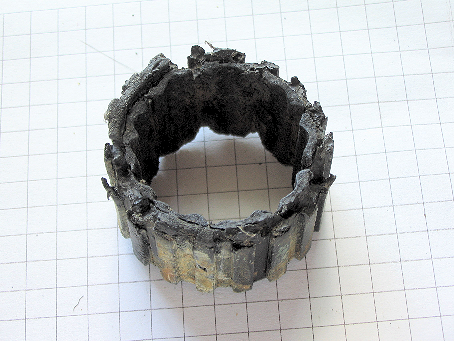
This badly deteriorated rubber ring (clutch) is probably not serviceable. The inside surfaces of the propeller must be cleaned of all old rubber and and sediment that has collected there.
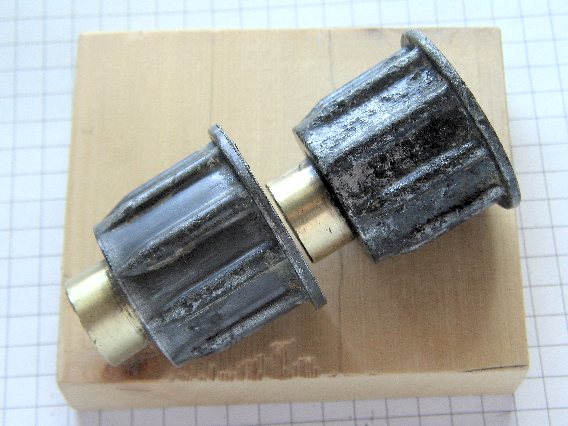
The exterior of the hub should also be cleaned of any rubber and oxidation. The figure below shows the difference between a hub (right) with a significant amount of oxidation removed and a relatively unused hub (left). Pitting is present on the hub to the right but it is still probably serviceable. The author found the small 1-inch diameter wire brush attached to a Dremel-type tool particularly helpful in cleaning oxidation and old rubber from the hub and propeller. Small fragments of rubber can be removed from the inside of the propeller with a Que-tip soaked with a 50:50 solution of Automatic Transmission Fluid (ATF) and Acetone. The end arbor of the hub should also be polished as below.
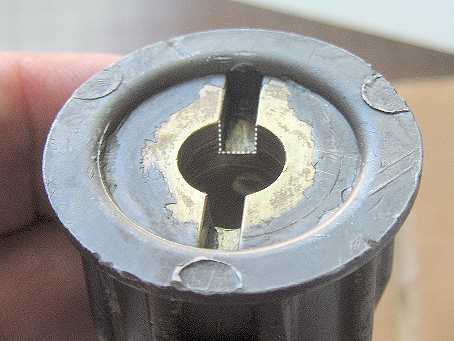
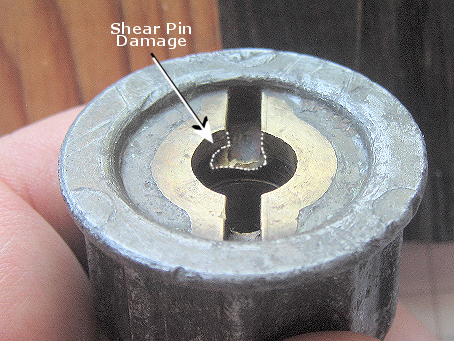
One other inspection of the hub should be made for shear pin damage. When the rubber ring becomes cemented to the hub and propeller, the shear pin slot of the hub can become damaged. The hub on the left shows an undamaged slot while the hub on the right has damage but is serviceable.
Lubrication
and Reassembly
Lubricate the exterior hub, both sides of the rubber ring, and the interior of the propeller with waterproof grease (Lubriplate 105 "Motor Assembly Grease" from NAPA or "Special Purpose Corn Head Grease" from John Deere). Lubricate the interior and exterior of the plastic flange. Reassemble on propeller shaft with shear pin.
Proper tightening of the propeller nut is of considerable importance: The nut must be screwed on the propeller shaft until it is "finger tight" then continue tightening with a wrench till the next alignment of the cotter pin hole. Insert the cotter pin and spread, and the nut is then properly adjusted.